Create an Event
To create an event, first log into the PCC Events App and make sure you've reviewed the preflight checklist. If you are editing an event, go to All Events (how to get to All Events) in order to edit an existing event.
Table of Contents
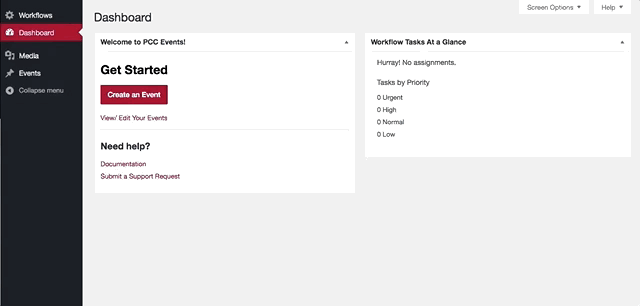
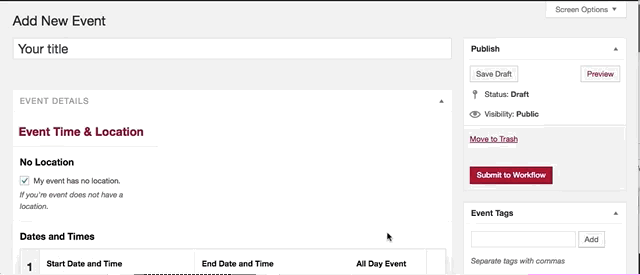
First, from the PCC Events App dashboard, click on "Create an Event" (or hover over "Events" in the left sidebar and click on "Add New").
A new page will load with a form for creating an event. The "Event Title" "Dates and Times," and "Location" are required.
1. Add Event Title
First, in the top field, add your "Event Title."
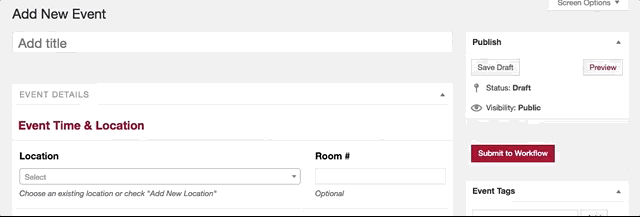
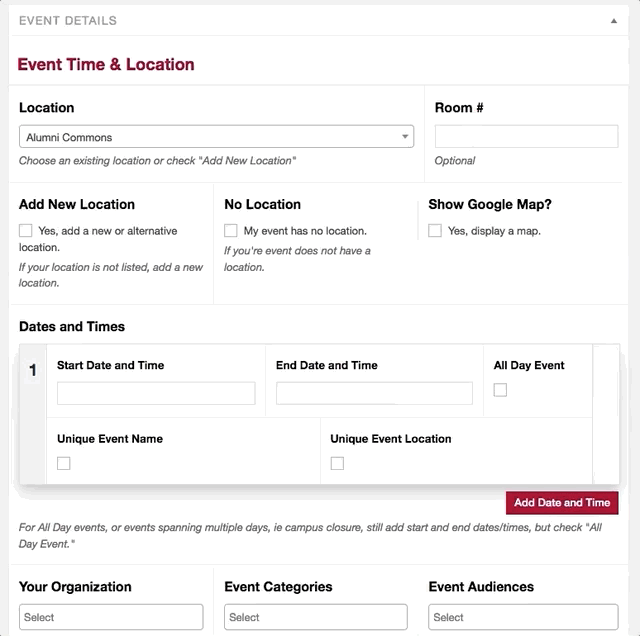
2. Add a Location for the Event
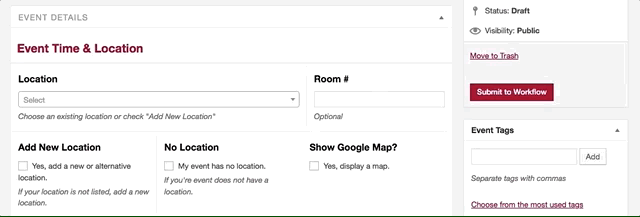
Next, you're going to add your Location for the event. You have three options options:
- Choose from an existing location or "Online" via the drop down. Use this option if the event is an online conference call or strictly online event with call-in details.
- Add a New Location via checking the "Add New Location" box.
- Choose "No Location" by checking the "No Location" box (if the event is online or does not have a physical location).
We'll discuss each below.
Choose an Existing Location or Online
- Under "Location" select a location on campus or select "Online" for online events.
(You can begin entering text of the location and it will filter results.)
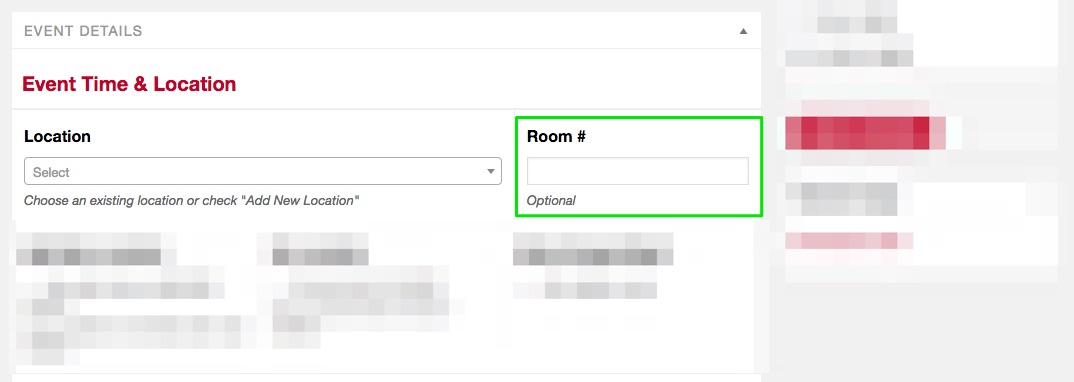
- If the event is in a specific room, under "Room #" add the room number. If the event
is "Online" add "Online Details" — this can include call-in information, URL, etc.
NOTE: If the building your event is located is on campus but is not within the Location dropdown, let the Web Office know and we can add it for future use.
Add a New Location
If you're event is off-campus or not within the Location dropdown, you can add a new location.
- Under "Add New Location" check "Yes, add a new or alternative location."
- Two new fields will be visible:
- Location Name: This is the heading/ name of the location, ie The Staples Center
- Location Map: Enter the address of the location here and if need be, move the map marker to the correct building/ space.
No Location
If your event does not have a physical location, under "No Location" check the box "My event has no location."
NOTE: A single event item can have multiple dates and times (a schedule), with this you can have multiple locations. See "Event Schedule and Multiple Dates" for more information.
3. Add Dates & Times
For each event you can have a single Date and Time, or you can add multiple Dates and Times, see "Event Schedule and Multiple Dates" for multiple Dates and Times documentation and use cases. Below, we'll discuss a single Date and Time.
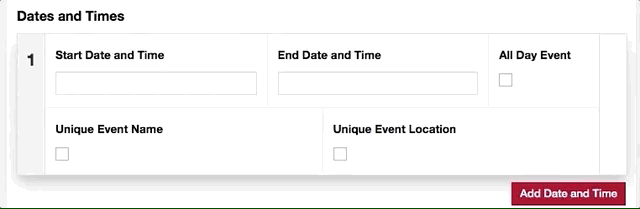
- Under "Start Date and Time" click in the empty field. A date and time picker will appear. Choose the Start Date and select the Start Time.
- If the event has an "End Date and Time," click in the empty field under "End Date and Time" and choose the End Date and End Time.
- If the event is "All Day" check the box under "All Day" — this may apply to campus closures, observances or other events that do not have a set Start and End time.
Beneath the Date and Time Pickers and "All Day" checkbox, you'll see "Unique Event Name" and "Unique Event Location" — both of these are discussed in "Event Schedule and Multiple Dates" and do not apply for a single Date and Time.
NOTE: At a minimum you need to have at least one Start Date and Time. If you do not have a "Time," the event will NOT be published unless you check "All Day."
4. Organization, Category and Audience
Next, you are going to select the organization, category and audience for the event.
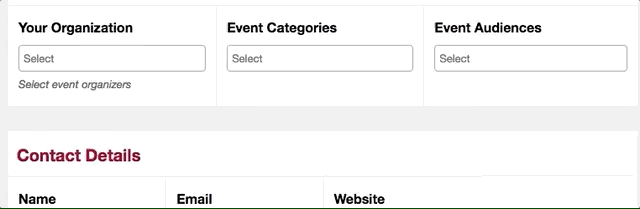
- Organization: Choose your organization or the organization that the event is associated with. If the Organization does not exist, contact the Web Office to request it be added.
- Category: Choose one or more Categories for the event. Learn more about Categories.
- Audience: Choose the appropriate audience(s) for the event. You have Community, Current Students, Faculty, Staff, and Future Students to choose from. If all apply, choose all.
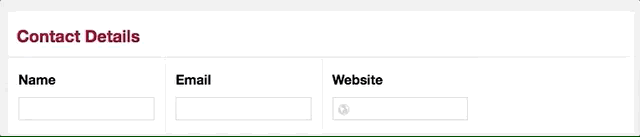
5. Contact Details (optional)
If you have a contact for the event, add it under "Contact Details" — this is the person whom people should contact if they have questions about the event.
6. Event Information
Cost
Under "Cost" add any details regarding the cost of the event. If Free, add Free. The field is an open text field, so you can add information about tickets, ie "$10 for Students, $15 for general public."
Link Event to External Website
If you would like to add a link to an external website, ie for Tickets or RSVP (EventBrite) check the box "Yes, link this event to an external website." You will then be prompted to:
- Enter the external website URL (include the "https://" part)
- Choose text for the button/ link
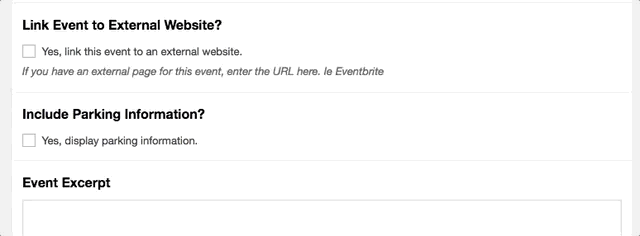
Include Parking Information
If you would like to add Parking Information for guests, check the box under "Include Parking Information." A visual editor will appear, where you can add details about Parking.
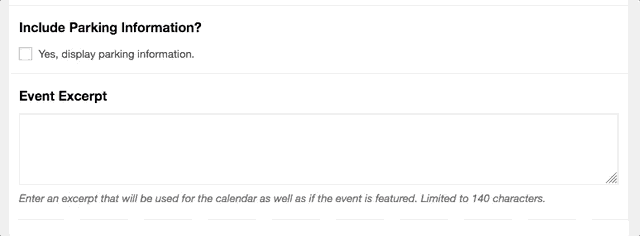
Event Excerpt
Under "Event Excerpt" add a short intro or excerpt about the event. In many cases this is all the additional information/ content you will need, but if you need to add more content, see below "Additional Content."
NOTE: The Event Excerpt is limited to 140 characters.
Additional Content
If you have more content that will fit within the Event Excerpt, check the box under "Do you have additional event content to add?" Checking the box, will open up a visual editor where you can add as much content as you like as well as upload images. Regarding image use, please see "Preflight and Image Sizes." Additionally, see the "Media Uploader."
7. Featured Image
In order for an event to be displayed on the homepage or as a featured event it must include a Featured Image. The featured image size must be 1200px X 600px, learn more about Image Sizes.
- On the right side of the page, find "Featured Image," and then click "Set featured image."
- Upload an image (see Media Uploader)
- Once uploaded, select the image (usually is already selected) and click "Set featured image" button.

8. Publishing Your Event
As an Event Contributor, you cannot directly publish events without Web Office approval. Once you are satisfied with your event, you will submit the event to workflow (learn more about Workflow). This will alert the Web Office of your event and add it to be reviewed and approved for publication on the PCC website (this usually takes only a couple hours, but can take up to 24 hours).
In order to have your event published, at a minimum you need to have at least one Start Date and Time. If you do not have a "Time," the event will NOT be published unless you check "All Day."
- In the top right, click on "Submit to Workflow"
- A popup will appear with Submission details:
- For Workflow, defaults to Publish Event
- For Priority, choose your Priority
- For "Publish Date" if you would like something other than immediately, enter the date.
- Within "Comments" leave the Web Office any helpful notes, questions or requests. This is where you can also indicate if you would like placement on the homepage or as a featured event.
- Click "Submit" to submit your event to the Web Office.
NOTE: If you do not want to submit your event, but rather just save as a Draft, see Saving an Event as a Draft."